3D Printing and Fabrication
One of the biggest advances in recent years has been the democratization of 3D fabrication through consumer grade technologies like 3D printers, CNC routers and mills, and laser cutters. These tools allow digital 3D models that were previously only viewable through the imperfect 2D interface of a monitor screen or a 3D Virtual Reality headset to be brought into physical reality fairly easily and cheaply.
Plastic Buildings and Wooden Maps
The last pre-pandemic class was able to explore 3D fabrication by taking advantage of our brand new Makerspace in Anderson Hall, and the expert guidance of its manager, Aaron Heidgerken-Greene, to make a hybrid digital/physical 3D model of Carleton’s Campus. This project moved back and forth across the analog/digital divide as we…
…researched the history of the physical buildings on Carleton’s campus to create a digital repository of archival images for each.

… refined a 3D digital model of each building that previous students working with our GIS Specialist Wei-Hsin Fu and our Academic Technologist for Digital Scholarship Andrew Wilson had already made.
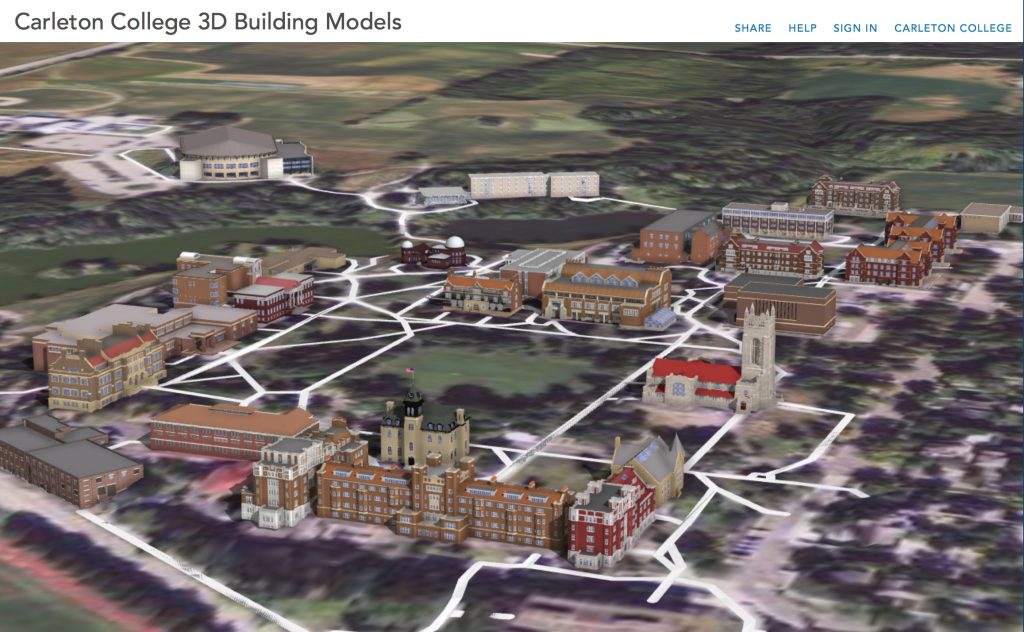
… made a GIS digital map of campus with contour lines for topography, and buildings color coded by use: residential, academic, or other.

… 3D printed tiny physical versions of the digital building models

… and positioned them on a physical version of the digital map laser cut out of wood

… and finally linked the physical product to the digital repository via a QR code in the lower right portion of the map, so viewers can read more about each building and the sources underlying the reconstruction.
Digitizing Archive Objects
This year, you are all helping launch the effort to 3D model objects from the Carleton archives. While you are curating your objects digitally (in the online repository Omeka), it would also be possible to reproduce them in a hybrid digital/physical form as 3D printed solids. An example of such a process is the Museum in a Box project, which creates miniature models of objects in a real museum.

You will not be required to produce printed models for our class project, but we will show how you might do something along these lines in your future work.
Processing a 3D model for printing
In order to print successfully a 3D model needs to be an entirely enclosed solid. That means it needs to be:
- Watertight (i.e. have no holes)
- Non-zero width (i.e. cannot be a true 2D plane)
- Oriented correctly (i.e. cannot have “reversed faces”)
In addition, the model should be set up with its origin centered, so that the model will import and rotate easily in printers or other 3D viewing/editing software.
There are many ways to clean an STL file, which is the preferred format for 3D printing, that range from free software to very expensive licensed options. We will be using a dedicated free service from Formware to optimize for printing.
OPTIONAL EXERCISE: Optimizing models for printing
Formware Cleaning
One of the easiest free options to quickly get a clean model for printing: the online Formware service at https://www.formware.co/OnlineStlRepair
- Go to the Formware service, and upload your stl file
- To export a .stl file for your model, look at the instructions on the last lab.
- Note: you can also get a .stl file for objects modeled in Fusion 360.
- You may need to wait for the queue and the file to process.
- To export a .stl file for your model, look at the instructions on the last lab.
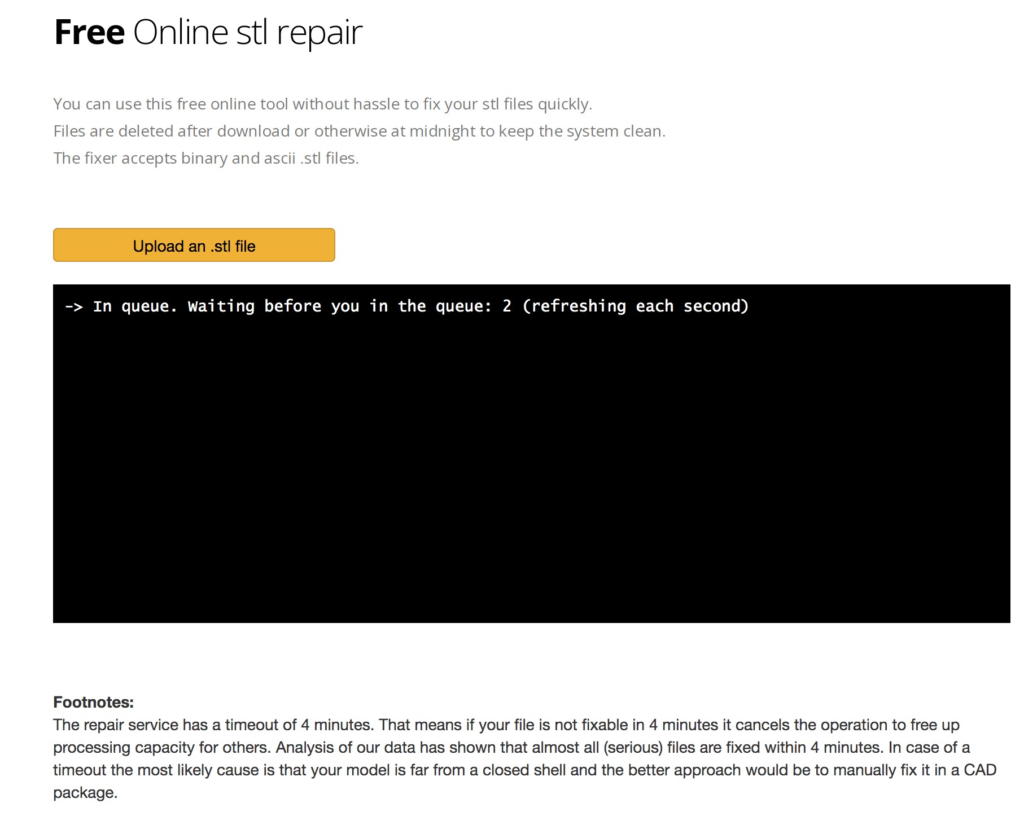

- Download the cleaned and fixed model
- Note: Photogrammetry models typically have more issues than models created in software like Fusion360.
- Put the original and cleaned STL file in your google drive folder alongside the image exports
- Save it as LastName_ObjectName.stl and LastName_ObjectName_fixed.stl
e.g. Mason_Die.stl and Mason_Die_fixed.stl
- Save it as LastName_ObjectName.stl and LastName_ObjectName_fixed.stl
Today we are touring the MakerSpace and if you want you can set up a print job to print your model.
For this week’s lab and blog assignments, see Tuesday’s lab page.