The Database Back End
In our continuing quest to explore what goes on “under the hood” of digital humanities projects, we are moving from the front-end client-side user experience to the database “back end” on the server side, where all the data storage and information retrieval magic happens. In order to perform analysis, or present the results of our research to the public on the web, we first need to collect, categorize and store our data in a way that will give us the best combination of structure and flexibility.
You can use a simple flat spreadsheet to store enough data to power some pretty impressive applications using JavaScript alone, like using the impressive selection of tools The Knight Lab has developed for data journalism, most of which rely on Google Sheets for the backend.
In the past, students in this class used the TimelineJS framework to make a Timeline of Carleton History, and the backend was nothing more than a simple Google Sheet.
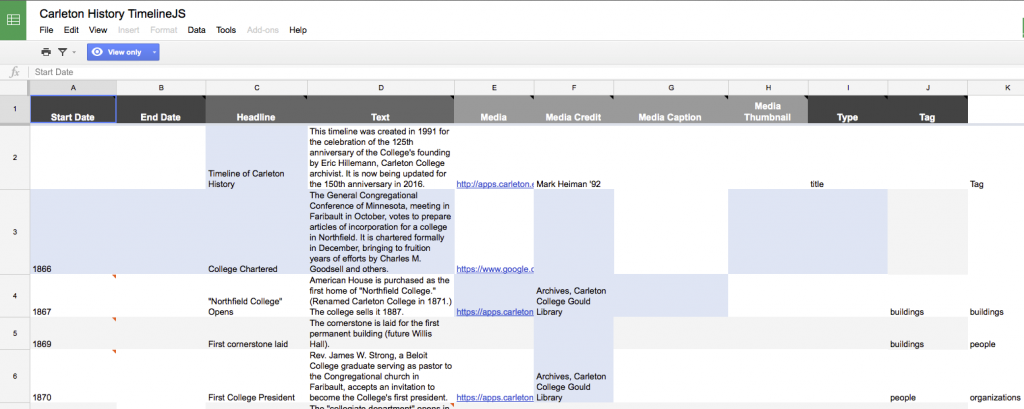
This works great for the timeline, but what if we wanted to do different things with the same data? What if we wanted to reorder our data by something other than chronology, or extract all the people or buildings, or add spatial locations? And what if we wanted to model the relationships between those elements? Our spreadsheet is just not flexible enough for this. In order to store complex data sets, we need a more sophisticated way to store it; enter the relational database.
There is a vast amount of literature out there on database design theory and practice, but the articles we read for this week provide a good starting point into the general characteristics of relational databases, and the raging debates over how to move beyond them in the brave new world of ‘big data‘ in humanities research.
The key takeaway from these debates is that “data” are not value free and neutral pieces of information. Any time we break information down and classify it into categories, we are imposing our human world view and experiences on the information, whether consciously or not. This is unavoidable, but the best way to deal with it honestly is to acknowledge our biases, document our decisions and explain our thinking at each step of the process. The resulting metadata (data about the data) are critical for successful scholarly projects, and we will discuss their importance throughout the course.
For today though, we are interested primarily in exploring how relational databases work in a typical DH project, which often shares a lot of similarities with how web applications work in general.
Note: An excellent relational database you should take advantage of is Zotero, an online citation manager. Take a look at this post on how to setup up Zotero, if you haven’t already used the program. Think about how the metadata are stored and how this database works, as opposed to the WordPress instance.
In-Class Exercise: Modeling Data and Metadata
We’ve spent the first few weeks of term getting a crash course in the technical infrastructure of web-based digital projects, and we have looked at how Content Management Systems like the WordPress platform this site runs on process and present data.
For most Digital Humanities projects, however, the data are going to be much more structured than blog post content. Figuring out how to model real world data in a way that let’s you answer your question or meet the goals of your project is a key part of any endeavor.
In a couple of weeks we are going to get a first taste by diving into the archives and beginning to gather data for our class project making 3D digitizations of objects from the college archives.
Today we are going to:
- explore the under-represented objects in various campus collections
- pick one that seems like would be a good candidate for 3d modeling and would have a good story to tell about Carleton’s history
- Add it to a class Omeka collection to think about structuring the data
Collections, Omeka, and Metadata
Metadata is essential to the organization of libraries and online collections. This is true of our Carleton College archives, which you may be using for your final projects. Our awesome librarians have set up a course guide for us that should be your starting point for entry into the archival holdings.
START HERE: Library Course Guide for DGAH 110: Hacking the Humanities
- Search through some of the resources on offer here.
- What types of sources are there?
- How might you model them as data?
Sometimes in can help to map your data to an established schema, such as the Dublin Core metadata schema employed by Omeka. This is what we are going to use to consider how to model the metadata about artifacts we might want to add to our collection.
Omeka
Omeka is a content management system and web publishing platform, much like WordPress or Drupal.
A few things set Omeka apart and make it a favorite for DH projects
- It was created by humanities scholars specifically for humanities projects, unlike most other platforms that have had to be hacked for humanist scholarship. Specifically, it was built by the folks at the Center for History and New Media (CHNM) at George Mason University, who also developed Zotero.
- It has robust support for metadata, by default the Dublin Core specification, a set of categories widely used by libraries, museums and cultural heritage organizations.
It’s primary use is in building collections—of documents, artifacts, images, etc.—and then organizing them into categories and allowing you to build Exhibits that tell a story from your primary sources.
An Example Project
The repository used in a past year’s class project on Carleton’s building history is one set up through a Reclaim Hosting server:
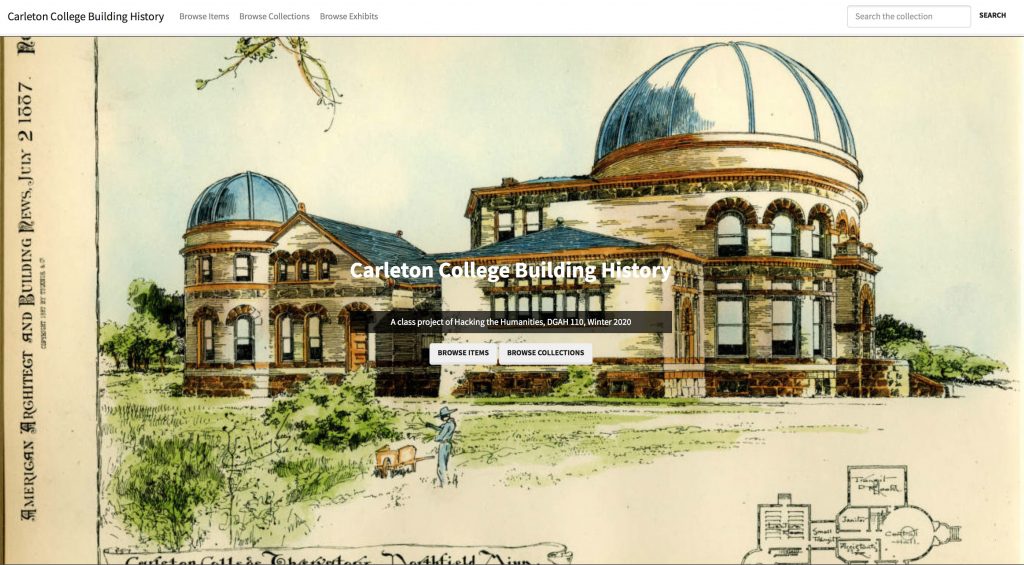
Carleton College Building History (https://campushistory.medhieval.com)
Click the link above to explore the front end of the website.
- How is the site organized?
- How is it similar to, or different than, the sites we’ve interacted with before?
- What ways are there to navigate around and find the content you desire?
In-class Exercise: Adding items to Omeka
For this course, I have set up a new and relatively empty Omeka site called DGAH Archive Objects.
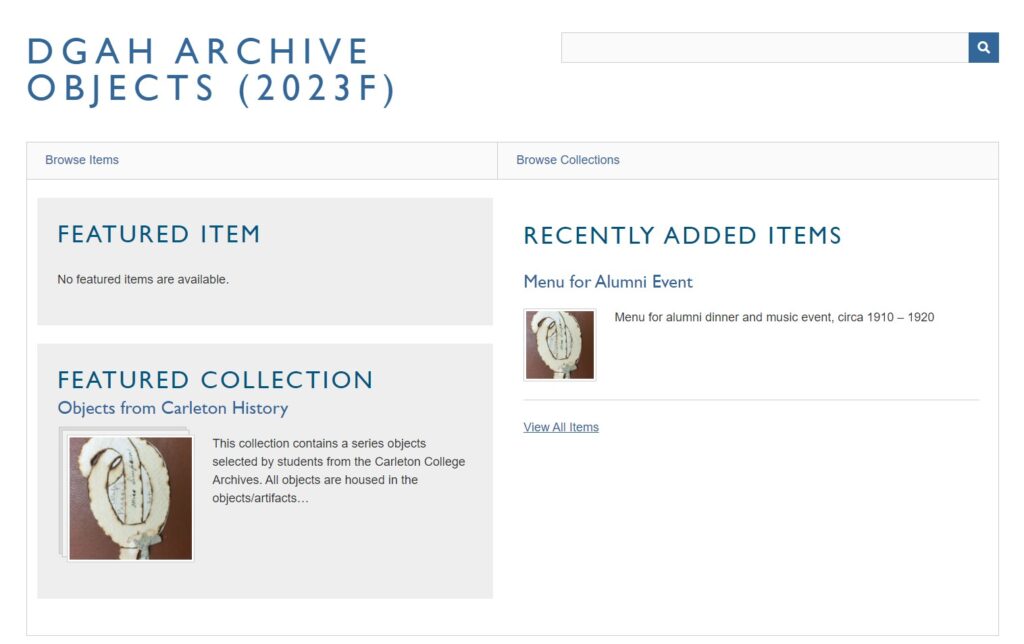
This is where we will start to build our dataset of artifacts with structured metadata about them. The archivists, special collections librarians, and museum curators have given us several lists of potentially interesting objects to use for this project.
- Explore the list of objects and images in our shared drive’s Archive Objects folder to find an object that may interest you.
- To find relevant metadata on these objects, see the list of collection contents.
- Follow the instructions in this Omeka Guide to get access to the site and add your item
(NB: the guide was created for a summer DH course so some of the information might not apply directly)- REFLECTION QUESTIONS
- As you work through the metadata fields, what intellectual decisions are you making?
- How might your converting an object into “data” affect the results of your project?
- REFLECTION QUESTIONS
Omeka Resources
For a good introduction to Omeka, see Johanna Drucker’s Omeka 101
For more overall introduction to Omeka and instructions on setting up free accounts with Omeka.net, see these two tutorials from Miriam Posner at the Programming Historian site:
For information on CSV import, customizing themes, Neatline and more, check out this fantastic and detailed Omeka admin guide for getting started up Omeka.org with the most common and useful plugins from Nicole Riesenberger et al. at UMD.
Lab Assignment: Setting up your own WordPress server (due Sunday)

For today, we are interested primarily in what a server space looks like on the admin side. So we are going to stick with what we already know and get to know databases by exploring and setting up your own WordPress server.
We are going to using our CarlSites cPanel in Reclaim Hosting, which will give you access to your own WordPress server to use both in this class and for any future DH work you engage in at Carleton.
Follow these instructions to log into your Carleton Sites cPanel and install your own WordPress site.
Lab Assignment 3 Specifications – Your own WordPress site
The assignment for this week is to get to know your new hosting environment by setting up your own WordPress site with full administrator controls:
First, make sure you have installed WordPress following the instructions linked above, and then spend some time setting up your personal website on your newly installed server. These are the most basic steps you should take to get your site looking like a personalized rather than a generic WordPress blog.
- Delete (or at least unpublish) all default content
- Hello World! post
- Sample Page
- Sample Comment,
- etc.
- Create an “About” page (not Post) to let the world know who you are
- Write a brief bio paragraph about your background, what you are studying, your goals, etc. and post it to the site. See Austin Mason’s at meDHieval.com for an example.
- Protect your site from comment spam, by activating the Akismet plugin.
- You can follow these instructions
- Choose a new theme to install and activate it
- Use the theme’s Customizer Additional CSS function or add the Simple Custom CSS plugin and use your DevTools skills to change at least one element of your site’s design via CSS code
- If you need help with installing plugins, or want to install more, follow the helpful guide at UMW’s Domain of One’s Own help site
Post the link to your new site in Moodle
CarlSites/WordPress Support
If you have any questions as you build your WordPress site in this class or in the future, I encourage you to reach out to Em Palencia in Academic technology. Em has also graciously shared the following resources:
- Support Documentation
- Report a Website Issue
- Meet with Digital Humanities Associates (DHAs)
- Tuesday and Wednesday evenings from 7 – 9 p.m.
- In-person drop-in at Libe 4th Floor, East Wing or via Zoom
- Contact Em in Academic Technology:
- email at@carleton.edu and ask for Em
- Em’s Office Hours
