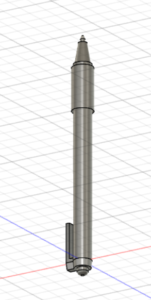
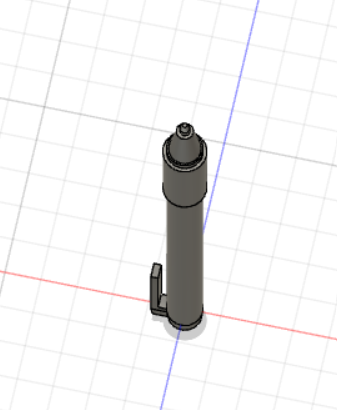
I found some parts of modeling this pen quite easy. The main shape is just different shapes of cylinders extruded out that use the taper angle variable in the extrude tool to make the cone shapes. The hard part, however, was the pen clip. The average clip of a pen extends from the bottom, goes towards the tip, and then bends back towards the base of the pen. I could not figure out how to bend the clip of the pen back towards the base. I decided to just compromise and not have it bend back towards the base, which does make it awkwardly stick out a little bit. I think that 3d modeling is incredibly important in regards to teaching and researching. In regards to teaching it lets the teacher showcase something from different angles allowing the class to understand it better than a single picture or even many from different angles. In regards to research you could either use 3d modeling to archive important sculptures or items. One tip I have that I wish I had realized earlier is that if you want to edit a part separate from the whole shape later on do not set it to extrude join but to make a new body. It was extremely difficult to edit a part and not the whole thing when the pen clip was part of the same body as the pen base.

Good job! Though I can’t say I went through the same process, that’s probably because a pen is a more complex object than a die. I wonder what kind of shape you used for the point of the pen. From the below perspective, it looks like a cone. Regardless, it looks really realistic.
You did an amazing job on this design. I appreciate all the details you added to the clip and the point of the pen as well as the proportions. I didn’t really need to build separate parts for my Lego brick, but I will definitely keep your tip in mind for future projects, it sounds like it could save me from a lot of frustration.